
Root An Xperia ZR
Jei atnaujinote savo Xperia ZR C5503 ir C5502 į Android 4.3 Jelly Bean, you may now be looking for a way you can root it. In this guide, we walk you through a method that can do just that.
Before we begin, let’s take a look at some of the reasons you might want to root your Android device:
Įsišaknijimas
- Gives you complete access to data which would otherwise remain locked by manufacturers.
- Removes factory restrictions on a device
- Allows changes to be made to internal system and operating systems.
- Allows the installation of performance enhancing applications, removal of built-in applications and programs, upgrading the devices battery life, and installing apps which need root access.
- Leidžia modifikuoti įrenginį naudodami modus ir pasirinktinius romus.
Paruoškite savo telefoną:
- The method here is only for the Sony Xperia Z C5503 / C5502. Don’t try with any other device
- Check your device: Settings > About device.
- Unlock the device’s bootloader.
- Turėti Įdiegtos „Android ADB“ ir „Fastboot“ tvarkyklės.
- Have a OEM data cable to establish the connection between PC and phone.
- Back up all importantmedia content, contacts, call logs and sms messages.
- Battery is at least charged to over 60 percent.
- Your device is running on latest Android 4.3 Jelly Bean 10.4.B.0.569 firmware.
- Check firmware: Settings > About device.
- You have enabled USB debugging mode on the phone.
- Nustatymai>Ryškalas options > USB debugging mode. Or
- Settings >tap build number 7 times.
Pastaba: metodai, reikalingi norint įjungti individualius atkūrimus, "rom" ir "root" savo telefoną, gali sukelti jūsų įrenginio įklijimą. Prietaiso prijungimas taip pat panaikins garantiją ir nebesuteiks gamintojų ar garantinių paslaugų teikėjų nemokamų prietaiso paslaugų. Būkite atsakingi ir nepamirškite, kol nuspręsite tęsti savo atsakomybę. Jei įvykis įvyko, mes ar prietaiso gamintojai niekada neturėtų būti laikomi atsakingais.
First, you need to have installed a CWM recovery.
įrengti a CWM atsigavimas Savo įrenginyje:
- Download CWM Recovery kernel. čia
- Copy downloaded boot.img file to Minimalus ADB "ir Spartusis paleidimas drivers folder.
- Open folder where you placed downloaded Recovery.img or boot.img file.
- Press and hold down the shift key while right clicking on any empty area in the folder. Click on "Atidaryti komandų langą čia".
- Turn off the Xperia ZR.
- Paspauskite ir palaikykite Garsumo didinimo raktas while you plug in the USB data cable.
- You will see the LED on your phone turn blue now, this means it is connected properly and in Fastboot mode.
- Komandos eilutėje įveskite: Fastboot flash boot boot.img [Replace Boot name with filename of what you downloaded],
- After a few seconds, recovery should flash on your phone.
- Remove the USB data cable.
- Turn on device. When you see the Sony logo press Pagarsinimas key rapidly. You should now boot into the CWM.
Now that you have a custom recovery, let’s go on to root your device.
Root Xperia ZR running Android 4.3 10.4.B.0.569 firmware:
- parsisiųsti užtrauktukas failas. SuperSu
- Copy the downloaded file to the phones internal storage or to the SDcard.
- Įkelkite savo telefoną į CWM atkūrimą.
- Install Zip > Choose Zip from Sd Card > SuperSu.zip > Yes
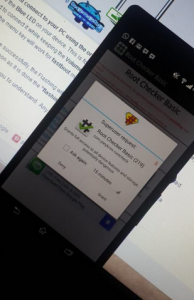
- SuperSu turėtų mirti dabar.
- Check that you can find it in your devices app drawer. If you do, then you know you have successfully rooted the device.
When your rooted, you can now go back to the phone’s stock kernel by doing the following:
- Open the Sony Flashtool.
- Hit the small lightening button that you can see on the top left and then click on
- Select the firmware that you just flashed.
- From the selection menu found on the right side, exclude everything but Kernel.
- Click on Flash then connect your phone on flashmode when you see the prompt.
- Kernel should now flash.
- You will now find that your are back in stock kernel and have rooted your phone.
Have you rooted your Sony Xperia ZR?
Pasidalykite savo patirtimi toliau esančiame komentarų laukelyje.
JR.
[embedyt] https://www.youtube.com/watch?v=T8LxRLPuJfo[/embedyt]


