Get Root On Your Galaxy Note 4 That Runs Android 5.0.1
Samsung has been updating their Galaxy Note 4 line of devices to run on Android 5.0 Lollipop. If you’re planning to update your device but have already updated to Android 5.0 Lollipop, you’ll have lost root access. However, it’s possible to regain root access and we’re going to show you how in this how-to. Follow along and root a Galaxy Note 4 that runs Andorid 5.0.1 Lollipop.
Paruoškite savo telefoną:
- Make sure that this is the correct how-to. This how-to will only work for the following versions of the Galaxy Note 4:
- Root Galaxy Note 4 SM-N910C that runs Android 5.0.1 Lollipop
- Root Galaxy Note 4 SM-N910S that runs Android 5.0.1 Lollipop
- Root Galaxy Note 4 SM-N910G that runs Android 5.0.1 Lollipop
- Root Galaxy Note 4 SM-N910F that runs Android 5.0.1 Lollipop
- Root Galaxy Note 4 SM-N910U that runs Android 5.0.1 Lollipop
- Root Galaxy Note 4 SM-N910W that runs Android 5.0.1 Lollipop
- Root Galaxy Note 4 SM-N910V that runs Android 5.0.1 Lollipop
- Root Galaxy Note 4 SM-N910L that runs Android 5.0.1 Lollipop
- Root Galaxy Note 4 SM-N910K that runs Android 5.0.1 Lollipop
- Root Galaxy Note 4 SM-N910H that runs Android 5.0.1 Lollipop
- Root Galaxy Note 4 SM-N910P that runs Android 5.0.1 Lollipop
- Root Galaxy Note 4 SM-N910T that runs Android 5.0.1 Lollipop
- Your battery is charged to at least 60 percent.
- You have an OEM data cable that can connect your device and your PC.
- All your important data – messages, contacts, call logs, media – are backed up and safely stored on a PC or laptop.
- Samsung Kies and other software which might interrupt Odin3 have been turned off.
- Pastaba: metodai, reikalingi norint įjungti individualius atkūrimus, "rom" ir "root" savo telefoną, gali sukelti jūsų įrenginio įklijimą. Prietaiso prijungimas taip pat panaikins garantiją ir nebesuteiks gamintojų ar garantinių paslaugų teikėjų nemokamų prietaiso paslaugų. Būkite atsakingi ir nepamirškite, kol nuspręsite tęsti savo atsakomybę. Jei įvykis įvyko, mes ar prietaiso gamintojai niekada neturėtų būti laikomi atsakingais.
- Atsisiųskite:
- Odin3 v3.10.6.
- "Samsung" USB tvarkyklės.
- SuperSu.zip
- CWM recovery.tar file

Kaip šaknis:
- Open the downloaded Odin3.exe on your PC.
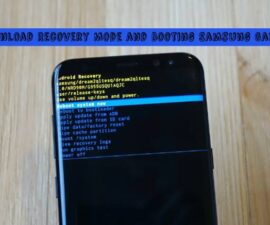
- Put the phone on download mode. Turn it off, wait 10 seconds, then turn it back on by continuously pressing the Volume Down, Home, and Power keys at the same time.
- When you see a notification, press Volume Up.
- Prijunkite telefoną ir kompiuterį.
- When Odin detects the phone, it’s ID:COM box will turn blue.
- If you have Odin 3.10.6 or Odin 3.09 select the AP tab. Then select the downloaded CWM Recovery.tar file.
- If you have Odin 3.07, you select PDA tab not the AP tab
- Press start. Wait for the rooting process to complete.
- Plug the device battery, wait 20 seconds before putting it back in.
- Boot CWM recovery by turning on your device by consciously pressing Volume Up + Home + Power.
- From CWM recovery, select “Install zip -> choose zip from /sdcard or /extSdCard -> select SuperSu.zip file- > select Yes
- When SuperSu.zip flashing has finished, reboot device.
Kaip patikrinti, ar įrenginys yra teisingai įsišaknijęs?
- Eikite į "Google Play" parduotuvę
- Rasti ir įdiegti "šakninio tikrintojo"
- Open then select “Verify Root”.
- Jums bus paprašyta SuperSu teisių, suteikti jai.
- You should see “Root Access Verified Now!”
That’s how you do it. Did you find this how-to helpful?
JR
[embedyt] https://www.youtube.com/watch?v=W2vsDg-AIgw[/embedyt]


